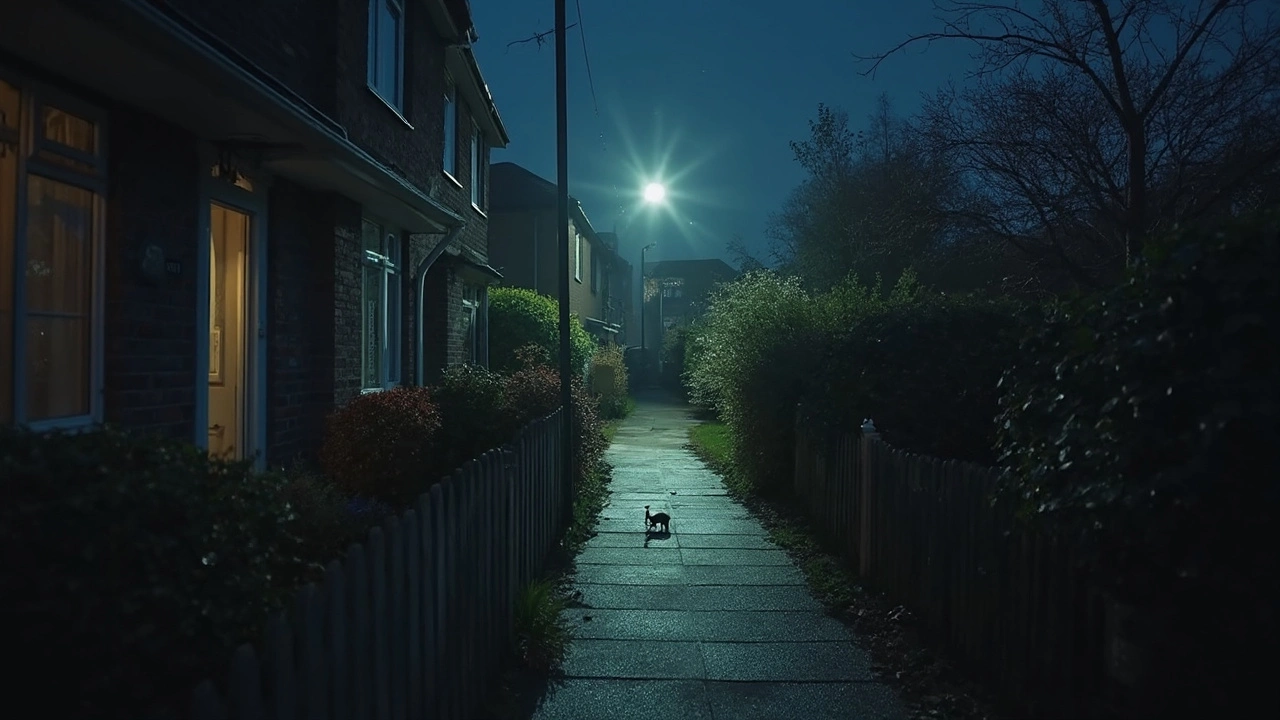
You’ve probably checked your security cam at night only to find fuzzy footage that’s about as useful as a flashlight with dead batteries. Night vision always looks awesome in movies, but real life is a lot messier. The good news? Most of those problems have simple fixes—even if you’re not a tech geek.
First, let’s get real: night vision works by using tiny amounts of available light, or by flipping on built-in infrared (IR) LEDs that are pretty much invisible to our eyes. Trouble is, rain, dirt, spider webs (and yep, even Nimbus once), and bad placement can ruin a perfectly good view. Before tossing your camera or spending more cash, a quick clean, reposition, and settings check is almost always worth it. You’d be shocked how many people have cameras pointed out windows and wonder why all they get is a blinding reflection (pro tip: glass reflects those IR lights right back).
- Why Night Vision Struggles (And What You Can Fix)
- Get More Out of Built-In Features
- Add Extra Light (Without Drawing Attention)
- Tips to Avoid Common Nighttime Blunders
Why Night Vision Struggles (And What You Can Fix)
Most people think their night vision camera is broken when the screen looks like a messy shadow puppet show. But here’s the truth: the problems often come down to basic science and stuff we overlook every day.
First off, camera night vision depends on light—even if it’s the kind you can't see (infrared). If you stick a camera in a pitch-black corner, it won’t work magic. It needs a little help. Even with built-in IR LEDs, things like fog, dirt, or a single rain droplet on the lens can cloud up the image. Night spiders love camera lenses too, and one web can turn your footage into a blur.
Next, placement matters. Mounting a camera right behind glass? Sounds smart, but IR lights just bounce off the window and blind the camera. Want a clearer picture? Move your camera outside or try covering the LEDs if you’re stuck inside. Also, make sure there aren’t any bright streetlights nearby throwing off the exposure. Cameras get confused by sudden changes in brightness, and that can make dark spots look even darker.
Focus can also mess things up. Night vision sometimes struggles with distance. A camera that rocks during the day might only light up a small area at night. Double-check your model’s max IR range—if your camera’s “night vision” only goes 20 feet but your driveway is 40 feet long, you’re basically rolling the dice on what gets caught after dark. Moving the camera closer can fix most of this.
- Keep the lens clean: A quick wipe once a week works wonders.
- Avoid placing the camera behind glass if it uses IR.
- Watch out for light sources that mess with the sensor.
- Know your camera’s IR range—don’t expect miracles from a budget model.
- Secure wires and mounts so there’s no wobble or shake.
Once you tackle these basics, you’ll already notice a big improvement. If things still look bad, don’t worry—there are a few more tricks in the toolbox.
Get More Out of Built-In Features
Most folks buy a camera night vision system and never poke around in the settings. That’s like driving a car but never adjusting the seat or mirrors. Extra clarity really is one menu click away if you know what to look for.
- Adjust IR settings: Most modern cams let you control when infrared kicks in. For places with streetlights or porch lights, don’t let the IR LEDs fight with other light. Dial them down or turn them off and see if your image sharpens up.
- Turn on Wide Dynamic Range (WDR): WDR helps your camera balance super bright spots and shadows. It’s a lifesaver if headlights or porch lights wash out your image.
- Set exposure right: You’ll see a big difference by tweaking the exposure instead of just using default settings. Too long and moving things turn blurry; too short and it’s too dark.
- Zone settings and motion sensitivity: These can cut down on false alerts triggered by headlights, bugs, or wind. Tinkering here means your phone stops blowing up every two seconds.
Some cameras also come with cool stuff like built-in noise reduction or smart IR (which stops faces from getting whited out up close). You shouldn’t need a new camera just to try these out. Most models you buy after 2022 offer them right in the menu.
| Feature | Benefit | Available On |
|---|---|---|
| Smart IR | Prevents bright white glare on close subjects | Arlo Pro 4, Reolink Argus 3, EufyCam 2C |
| WDR | Balances uneven lighting | Wyze Cam v3, Logitech Circle View, Hikvision DS line |
| IR Intensity Adjust | Fine-tunes how much infrared is used | Reolink 510A, Lorex 4K Ultra HD cams |
| Noise Reduction | Removes static for clearer images | Google Nest Cam (battery), Amcrest UltraHD |
Spend 10 minutes on settings and you’ll notice sharper videos, fewer false alarms, and way less headache at night—without dropping another dime.

Add Extra Light (Without Drawing Attention)
Stuck with shadowy, grainy footage even after tweaking settings? The real game-changer for night vision cameras is more light — but not the glaring floodlights that’ll wake the whole neighborhood and tip off anyone sneaking around.
The cool thing about camera night vision is that you can boost it with IR (infrared) illuminators. These gadgets give off light you can’t see, but your camera can. They work like invisible flashlights. Most security cams have some IR built in, but it’s usually pretty weak—great for a few feet, pretty useless for yards. External IR illuminators get you way more range, and you can mount them anywhere you want without drawing attention.
- Location matters: Place IR illuminators near your camera but not in direct view of the lens (to avoid glare).
- Power up: Always check the range on the illuminator – some cheap ones max out at 10 feet, while better models easily hit 80–100 feet.
- Weatherproof: Get an IP65 or better-rated model if you’re using it outdoors. Rain kills electronics quick.
If you want to stick with visible light but keep things sneaky, try low-wattage ‘warm-white’ LED bulbs with motion sensors. These don’t blast out a ton of light, but at night, even a small bump in brightness is a huge upgrade for your camera’s sensor. Bonus: motion triggers are less likely to annoy your neighbors and only light up if something moves.
| Light Source | Effective Range | Visible to Humans? | Notes |
|---|---|---|---|
| Built-in IR LEDs | 10–30 feet | No | Common on most cameras; weak beyond short distances |
| External IR Illuminator | Up to 100 feet | No | Customizable, can cover bigger spaces |
| Visible LED Sensor Lights | Varies (15–50 feet) | Yes | Can double as a deterrent, but less stealthy |
A 2023 home security survey showed that most camera users never add extra lighting—those who did saw up to 3x clearer footage at night. So don’t just rely on what comes out of the box. Adding a small, well-mounted IR illuminator or a motion-activated LED outside could mean the difference between catching details or missing everything.
Tips to Avoid Common Nighttime Blunders
Even the fanciest camera night vision setup falls short if you slip up on the basics. It's wild how many problems start with the same handful of mistakes. Let’s run through what trips people up—so you don’t end up watching a bunch of grainy nonsense.
- Don’t place cameras behind glass or shiny surfaces. That’s a surefire way to get ghostly glare instead of a clear image. Infrared bounces right back, so stick to mounting outdoors or behind screens that let IR through.
- Clean your lens, regularly. Cobwebs, dust, or even leftover raindrops can wreck your night footage. I have to give Nimbus partial credit for some smudges. Seriously, wipe the lens down every week—especially during bug season.
- Avoid pointing cameras at lights. Even a distant streetlamp or a neighbor’s porch light can fool the sensor, leading to washed-out video or weird flickering. Try aiming your camera away from direct light sources, or shield it with a small hood.
- Watch out for battery life. Night vision draws more power, so wireless cams die faster after dark. Plug in when you can, or at least check your battery level more often.
- Double-check your settings. Some cameras let you manually bump up IR or adjust gain. Play with those in the app—don’t just trust the auto mode. You’ll quickly spot a difference.
And just because everyone makes mistakes—don’t sweat it if your first setup looks awful. As security industry expert Jason Dunning says:
“Half of the night vision issues people face are just about where or how the camera is set up. Small changes make all the difference.”
Stick with the practical stuff and you’ll get way better night shots. No magic, just simple changes that actually matter.