Camera Bandwidth Calculator
Your Camera Setup
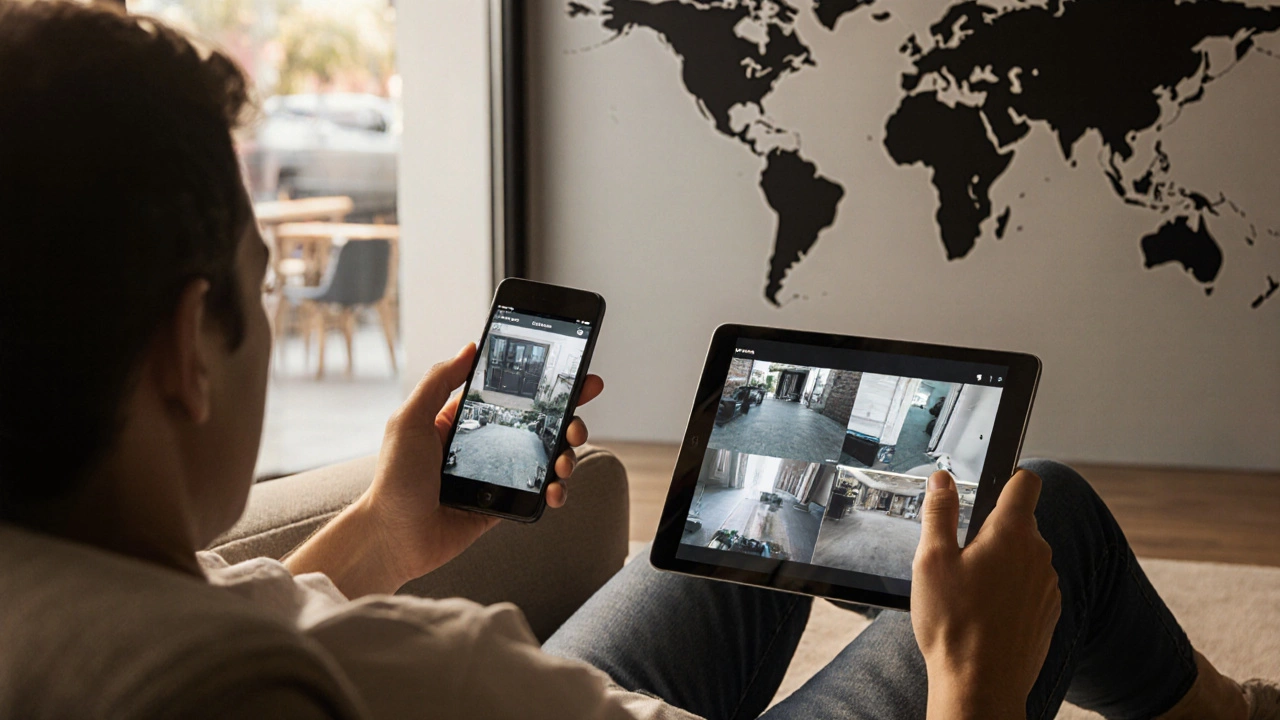
Wondering if you can watch security cameras online from your couch, coffee shop, or while traveling? The short answer is yes - modern systems let you view live video from virtually anywhere with an internet connection. But getting there involves a few choices, some networking know‑how, and a handful of security best practices. Below we break down everything you need to know so you can start checking in on your home or business without fuss.
What “online” really means for security cameras
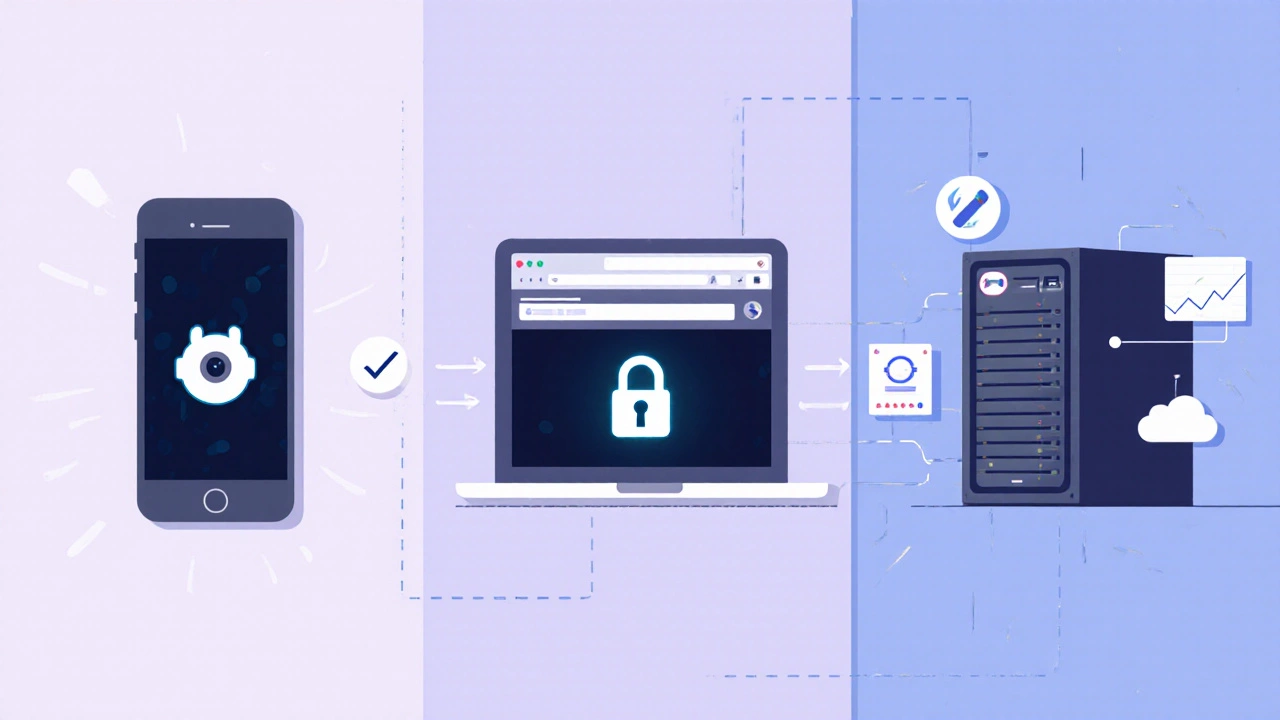
When we say a camera can be watched online, we’re talking about two core pieces of tech: an IP camera that streams video over a TCP/IP network and a means to reach that stream from outside your local Wi‑Fi. The camera itself lives on a private network (often behind a router at 192.168.x.x). To see it from the internet you either let a cloud service pull the feed for you, or you punch a hole through your router so your phone or laptop can talk straight to the device.
Three main ways to access your feed
Industry surveys split remote access into three buckets: manufacturer‑specific apps, web‑browser interfaces, and third‑party software or cloud services. Each has its own pros and cons.
| Method | Setup time | Device compatibility | Security level | Typical cost |
|---|---|---|---|---|
| Manufacturer app (e.g., Arlo, Reolink) | 5‑10 min (QR code) | iOS, Android, web portal | d>High (TLS 1.2+, 2FA optional)Free‑to‑use, premium cloud optional | |
| Web browser (HTTPS portal) | 10‑20 min (port forward/UPnP) | Chrome, Safari, Edge, Firefox | Medium‑High (depends on router config) | Usually free |
| Third‑party software (Blue Iris, iSpy, Agent DVR) | 30‑45 min (manual config) | Windows, macOS, Linux, mobile apps | High (supports TLS, custom auth) | One‑time license or subscription |
| Cloud service (Reolink Cloud, Nest Aware) | 5‑15 min (account link) | All major platforms | High (managed encryption, zero‑trust) | Monthly fee for storage |
Getting started with a manufacturer app - the easiest route
Most consumers pick the app that comes with their camera brand. The workflow looks like this:
- Plug the camera into power and connect it to your home Wi‑Fi.
- Open the brand’s app on your phone, scan the QR code on the device, and follow the on‑screen prompts.
- The app auto‑creates a cloud link, registers the device on the manufacturer’s server, and gives you a secure HTTPS URL.
- From now on you can tap an icon and see live video, get motion alerts, and replay stored clips.
This method sidesteps any router configuration. The downside? You’re locked into the vendor’s ecosystem - you can’t mix and match cameras from different brands without a third‑party hub.
Using a web browser - platform independence with a few extra steps
If you prefer a PC or want to avoid vendor lock‑in, the web portal route works well. Here’s a quick checklist:
- Router configuration: assign a static IP to your NVR or main camera (e.g., 192.168.1.10).
- Open the router’s admin page and forward an external port (commonly 8000 or 8080) to the camera’s internal port 80.
- Enable UPnP if you want the router to handle the forwarding automatically - just remember it opens a temporary hole each time the camera boots.
- Write down your public IP address (or use a dynamic DNS service if your ISP changes it often).
- Navigate to https://your‑public‑ip:8080 in Chrome, Safari, Edge, or Firefox. Modern browsers no longer need ActiveX or Java plugins, so you’ll see the feed instantly.
Security tip: change the default admin password on both the camera and router, use at least a 12‑character mix of letters, numbers, and symbols, and enable HTTPS if the firmware supports it.
Third‑party software - power for pros and hobbyists
When you have a mix of brand‑specific cameras, or you need advanced analytics (like people counting or facial blur), third‑party packages shine. The typical workflow includes:
- Install the software on a dedicated PC or a low‑power server.
- Add each camera’s RTSP URL (Real‑Time Streaming Protocol) - you can usually find this in the camera’s web UI.
- Configure motion detection zones, storage paths, and optional cloud backup.
- Set up two‑factor authentication (2FA) in the software’s user‑management panel.
Because you’re handling the streams yourself, you keep full control over privacy, but you also bear the responsibility of keeping the server patched. A typical installation for a non‑technical user takes about 45 minutes, according to Get Safe and Sound (2025).
Cloud services - the “no‑port‑forwarding” solution
Cloud platforms such as Reolink Cloud, Nest Aware, or Arlo Secure have grown fast because they eliminate the networking hassle. Once you link your camera to the cloud, the vendor runs a relay server that pulls the video and streams it back to your app over TLS 1.3. Benefits include:
- Zero configuration - no router changes needed.
- Automatic firmware updates and secure session timeouts (NIST SP 800‑161 recommends a 15‑minute inactivity logout).
- Built‑in 2FA and encrypted storage.
The trade‑off is a recurring subscription for video retention and a privacy consideration: many free tiers retain rights to analyze footage for “service improvement.” Make sure you read the privacy policy before you commit.
How much bandwidth do you need?
Remote viewing isn’t just about software; it’s also about internet speed. For standard‑definition (SD) streaming, each camera needs roughly 1.5 Mbps upload from your home. High‑definition (HD) streams push that to 3‑5 Mbps. If you have multiple cameras live‑viewing at once, add the numbers together. A typical 100 Mbps cable plan easily handles a 4‑camera HD setup, but a slower satellite link could struggle, leading to laggy frames or dropped connections.

Security pitfalls and how to avoid them
Every open port is a potential attack surface, as Dr. Alan Paller of the SANS Institute warns. Here are the top three mistakes and quick fixes:
- Leaving default passwords. Change them immediately; use a password manager to generate a 12‑plus‑character passphrase.
- Misconfigured port forwarding. Double‑check that you forward only the ports you need, and consider restricting access by IP address.
- Skipping firmware updates. Set your camera to auto‑update, or schedule a monthly check.
Implementing two‑factor authentication can cut unauthorized‑access incidents by 98 % (Security Sales & Integration, 2024). For extra peace of mind, place the camera’s NVR on a separate VLAN and use a business‑grade router that supports zero‑trust networking.
Common user questions and quick answers
- What if my public IP changes? Use a dynamic DNS service like No‑IP or DuckDNS; the service updates a domain name with your new IP automatically.
- Can I view multiple cameras on one screen? Yes - most manufacturer apps and third‑party dashboards let you create a grid view of 4, 8, or even 16 feeds.
- Do I need a special internet plan? Only the upload side matters for remote viewing; a typical broadband plan (≥10 Mbps upload) is sufficient for a few HD streams.
- Is it safe to use my phone’s cellular data? Absolutely, as long as you’re on a secure network (HTTPS) and have a strong device password or biometrics enabled.
Step‑by‑step checklist for a reliable setup
- Choose your remote‑viewing method (app, browser, third‑party, cloud).
- Assign a static internal IP to the camera or NVR.
- Update the firmware to the latest version.
- Set a strong, unique admin password (12+ characters).
- If using port forwarding, open only the required ports and enable a firewall rule to limit source IPs.
- Enable two‑factor authentication on the account or software.
- Test the remote link from a device on a different network (e.g., mobile data).
- Document the settings (IP, ports, DNS name) in a secure note for future reference.
Follow this list and you’ll have a remote‑viewing system that’s both convenient and hard for attackers to breach.
Future trends - where remote viewing is headed
Manufacturers are moving toward WebRTC‑based streaming, which eliminates the need for any port forwarding at all. By 2026, analysts predict over half of new consumer cameras will use this tech, offering load‑balanced, peer‑to‑peer connections that run directly in the browser. At the same time, privacy‑focused services are adding on‑device AI that can blur faces before the footage ever leaves your home network.
Keep an eye on firmware release notes - a zero‑trust update from Reolink in April 2024 cut configuration time by 63 % and boosted security scores by 41 %. Those kinds of improvements show that the industry is listening to the security‑first crowd while still making remote access simple for everyday users.
Do I need a separate internet connection for remote viewing?
No. The same broadband line that powers your home Wi‑Fi also provides the upload bandwidth your camera needs. Just ensure the upload speed meets the camera’s requirements (1.5 Mbps for SD, 3‑5 Mbps for HD).
Can I view my cameras if my ISP changes my public IP?
Yes. Use a dynamic DNS service that automatically updates a domain name whenever your IP changes, so you never have to edit the router settings again.
Is it safe to enable UPnP for automatic port forwarding?
UPnP is convenient but opens a temporary port each time the device starts. If security is a top priority, prefer manual static port forwarding combined with IP‑based firewall rules.
What’s the biggest privacy risk with cloud‑based camera services?
Free tiers often retain rights to analyze your video for product improvement. Review the provider’s privacy policy and consider a paid plan that guarantees data is stored solely for you.
Do I need a VPN to watch my cameras remotely?
A VPN adds an extra layer of encryption and hides your public IP from the camera’s web portal. It’s optional but highly recommended if you frequently use public Wi‑Fi.